
From Grain to Green: Insulating the Ipswich Silo Remodel
Written by: Michal Szydlowski
Key Takeaways
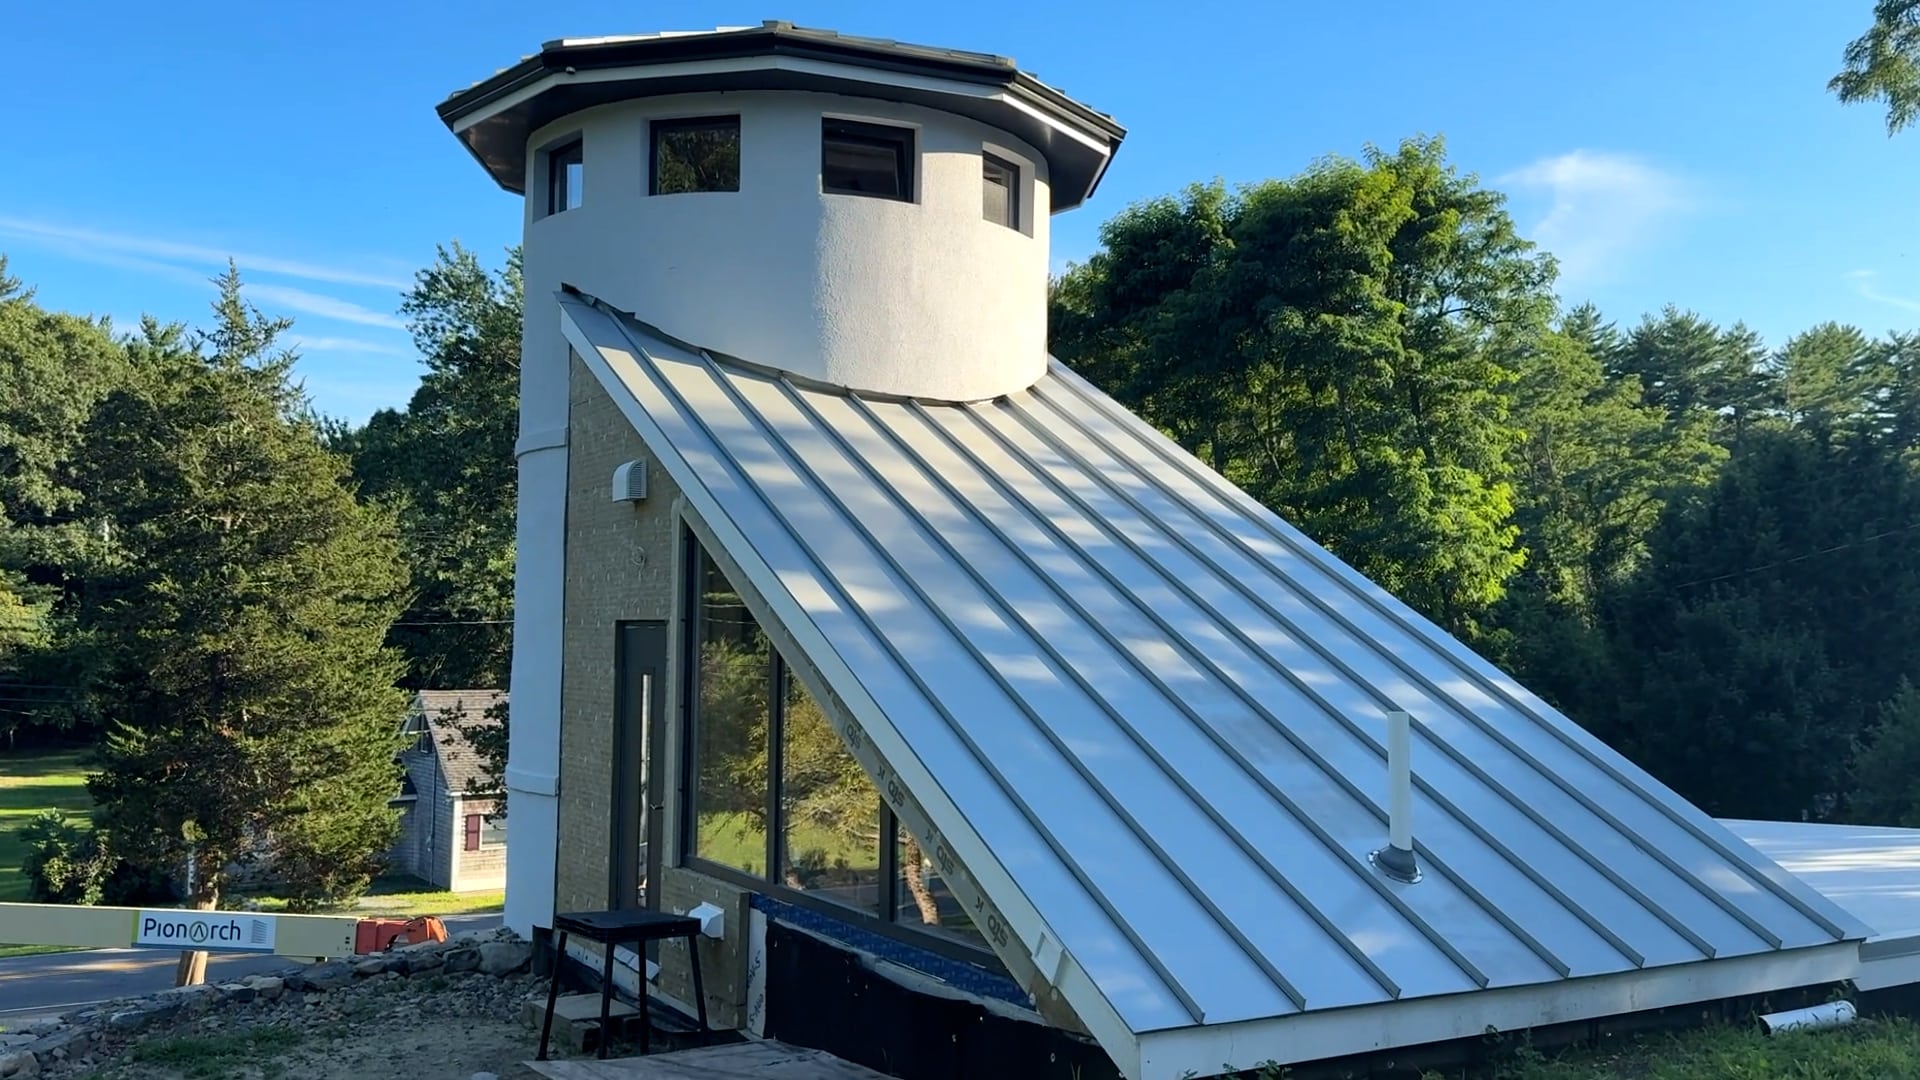
This Ipswich silo renovation focuses on preparing a future bedroom inside a twelve foot diameter grain silo with curved terracotta walls and a nearly twenty foot ceiling. The project combines continuous insulation, mineral wool, custom framing, HVAC planning, fresh air ventilation, and specialized below grade plumbing to improve comfort and long term performance. The article follows the construction sequence from the raw concrete tunnel and supporting rooms to the insulation and mechanical systems being installed inside the silo.
Planning Year Round Comfort Inside a Grain Silo
What does it take to make a future bedroom inside a grain silo comfortable without losing the character that made the structure worth saving in the first place? That is the question we are working through at the Ipswich project. The original silo is twelve feet in diameter, built with curved terracotta walls, and nearly twenty feet high at the peak. It was never designed to hold a finished bedroom, modern wiring, insulation, ventilation, or the other systems that make a room comfortable year round.
At this stage of the work, the focus is on the layers that will determine how the room performs later. We are preserving the silo’s volume while creating space for insulation, wiring, and its own ventilation system. We are also planning for heat loss and fresh air in a tall enclosed space. Those decisions happen now, before the framing and insulation disappear behind drywall. The silo is connected to the finished house by a below grade tunnel. Along that route are several supporting spaces, including an unfinished gym and water heater room, a laundry closet, and a bathroom. Each space brings a different set of construction challenges and decisions to the surface.
Raw Concrete Tunnel Finishes
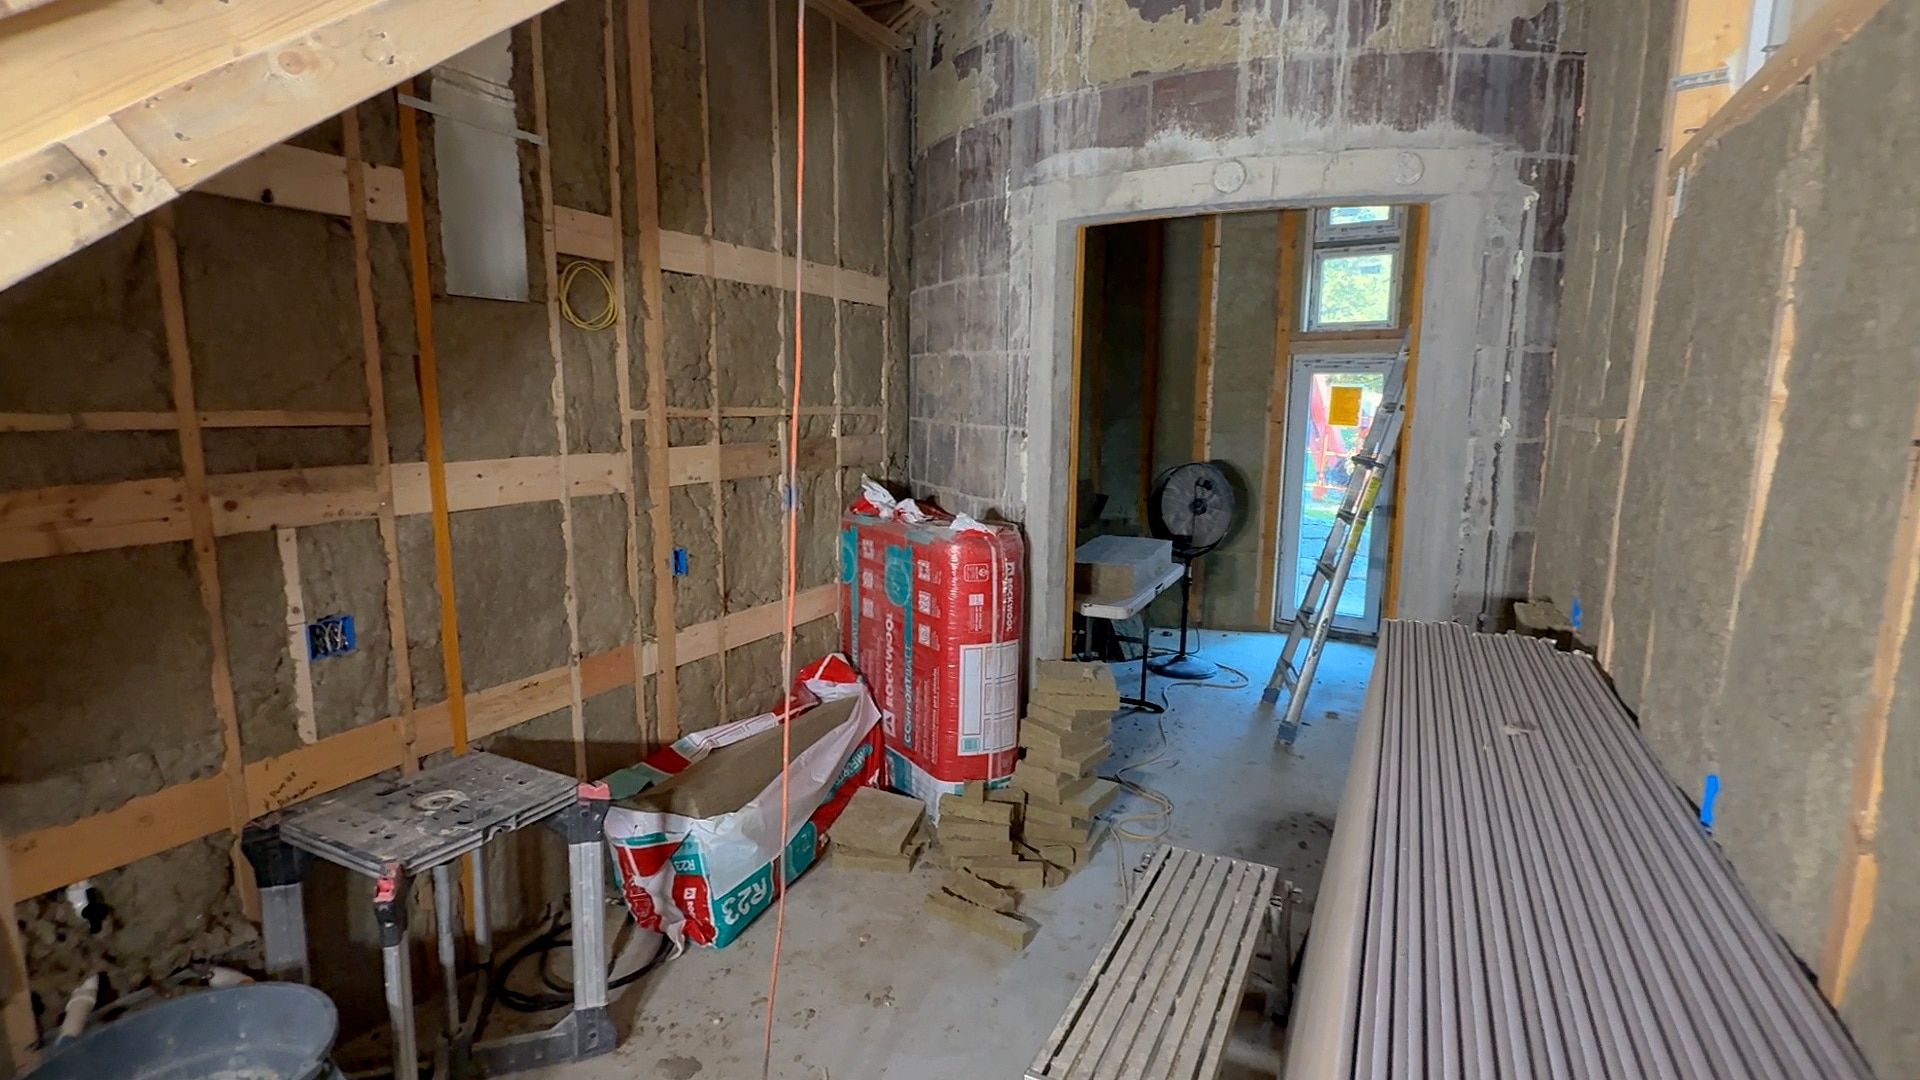
The first of two rooms in the tunnel section will serve as a gym and water heater room, acting as a transition between the main house and the silo. This will be the only section of the tunnel that remains raw concrete. The overall appearance here needs to support that industrial character rather than be covered with an unrelated finish. In order to do that, we are using half inch cement boards on the framed walls and ceiling, followed by a parged mortar finish. The result will have a mineral surface that relates directly to the existing concrete.
This choice is also practical. A gym and mechanical room need durable surfaces that can tolerate occasional impact, equipment movement, and changes in humidity. Cement board provides a stable base for the mortar finish and is better suited to this environment than standard interior drywall.
The finished room will not be styled to look industrial. Its character will come naturally from the materials themselves, including the raw concrete, cement board, and parged mortar. The construction will define the aesthetic rather than relying on applied finishes or decorative elements.

Below Grade Insulation and Sound Control
The insulation strategy has to address both heat loss and sound transmission. The tunnel contains large areas of concrete and masonry, while the laundry, bathroom, air handler, and water heater all introduce potential sources of noise. The exterior continuous insulation is two inches of Rockwool Comfortboard 80. Inside the framed walls and ceilings, we are using Rockwool Comfortbatt in R15 and R23 configurations, depending on the available depth.
Continuous insulation is important because framing members interrupt cavity insulation. Every stud creates a path where heat can move more easily through the wall, known as thermal bridging. An exterior layer helps reduce that thermal bridging and makes the envelope more consistent. Mineral wool also helps with sound attenuation. It fills the cavities around rooms where laundry equipment, plumbing, fans, and mechanical equipment will operate. The insulation is not expected to make the rooms silent, but it reduces the transfer of sound through the partitions.
The performance comes from the entire assembly rather than one product. Concrete, exterior insulation, cavity insulation, air sealing, framing, and finish materials all affect the result. We coordinate those layers together instead of treating insulation as a final item installed after the important decisions have already been made.
Framing for Plumbing, Wiring, and HVAC
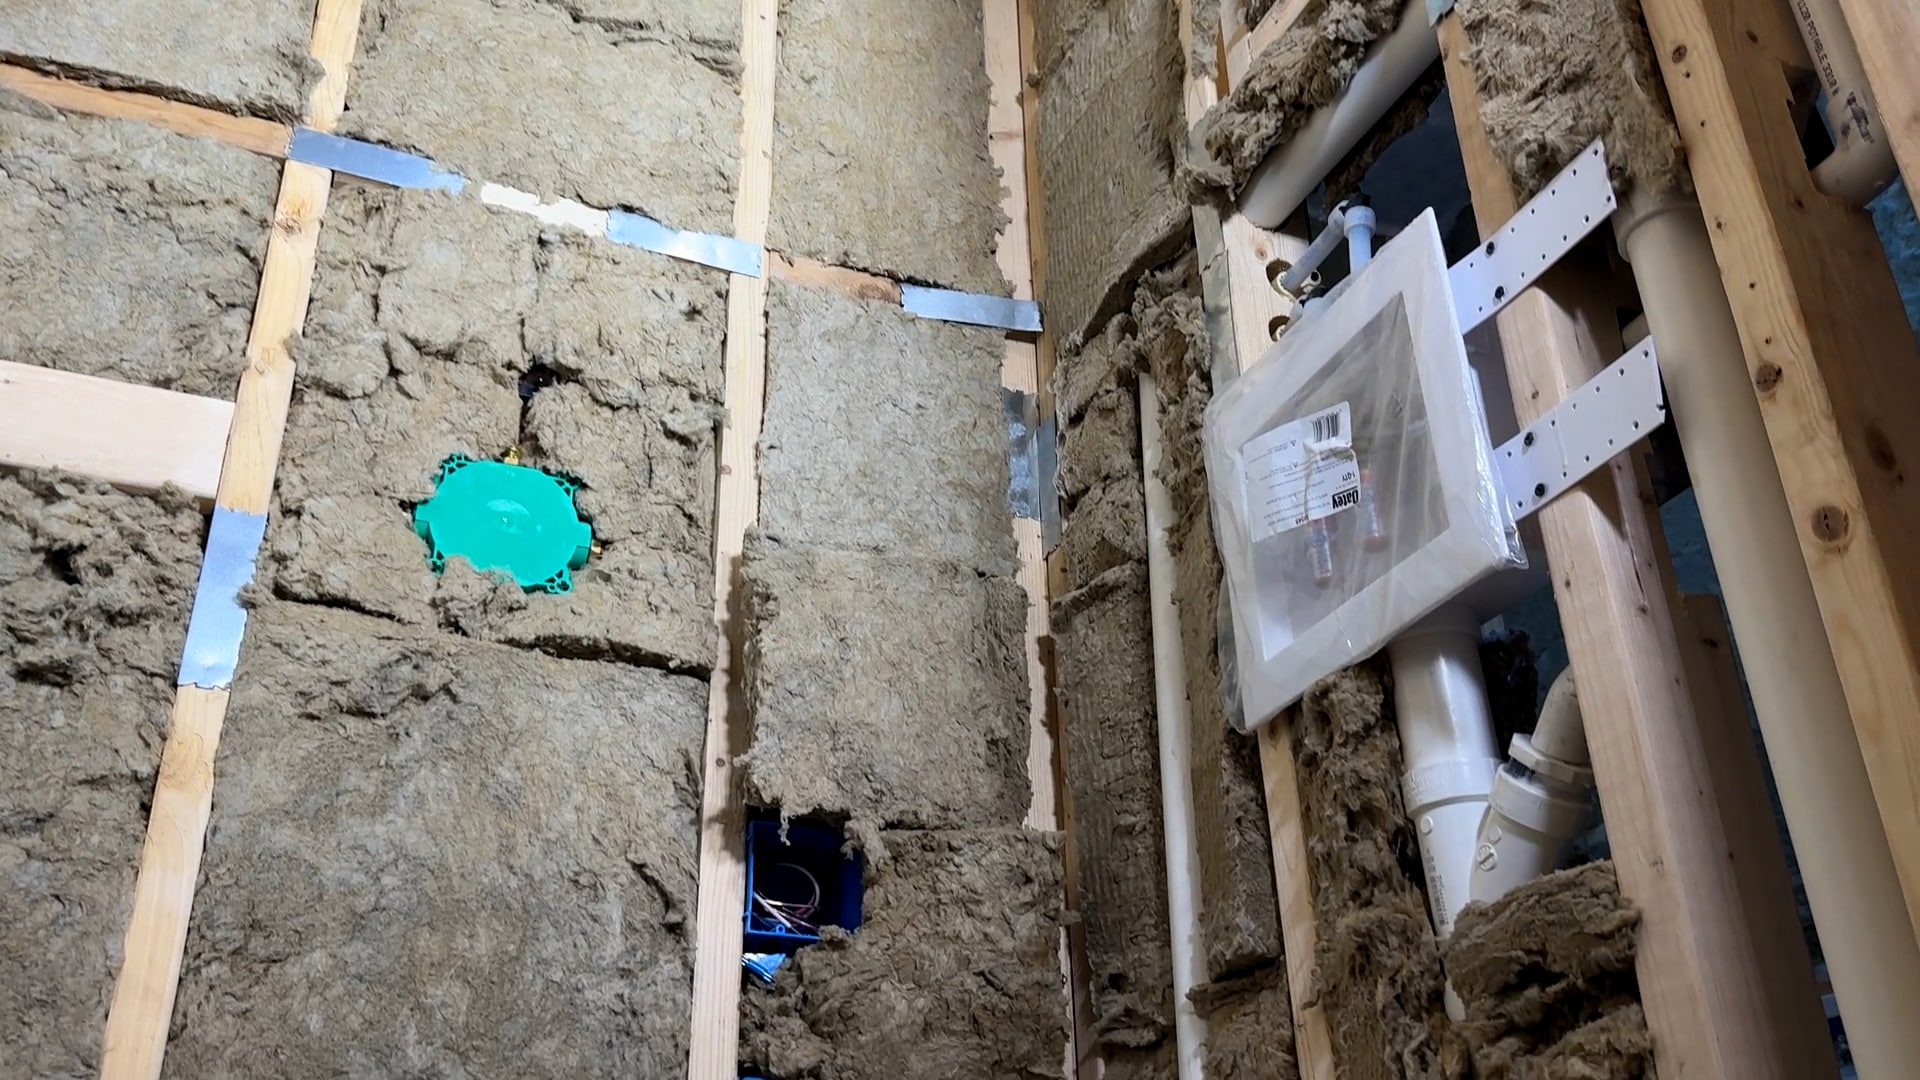
The ceiling framing in the tunnel area uses 2×12 joists. This structure originally served as the form for pouring the concrete. Once the concrete was in place, the framing depth became useful for more than structural support. We decided to use that space to route pipes, wires, and ducts while adding insulation. That avoids unnecessary cutting into the concrete and reduces the need to create separate service chases throughout the room.
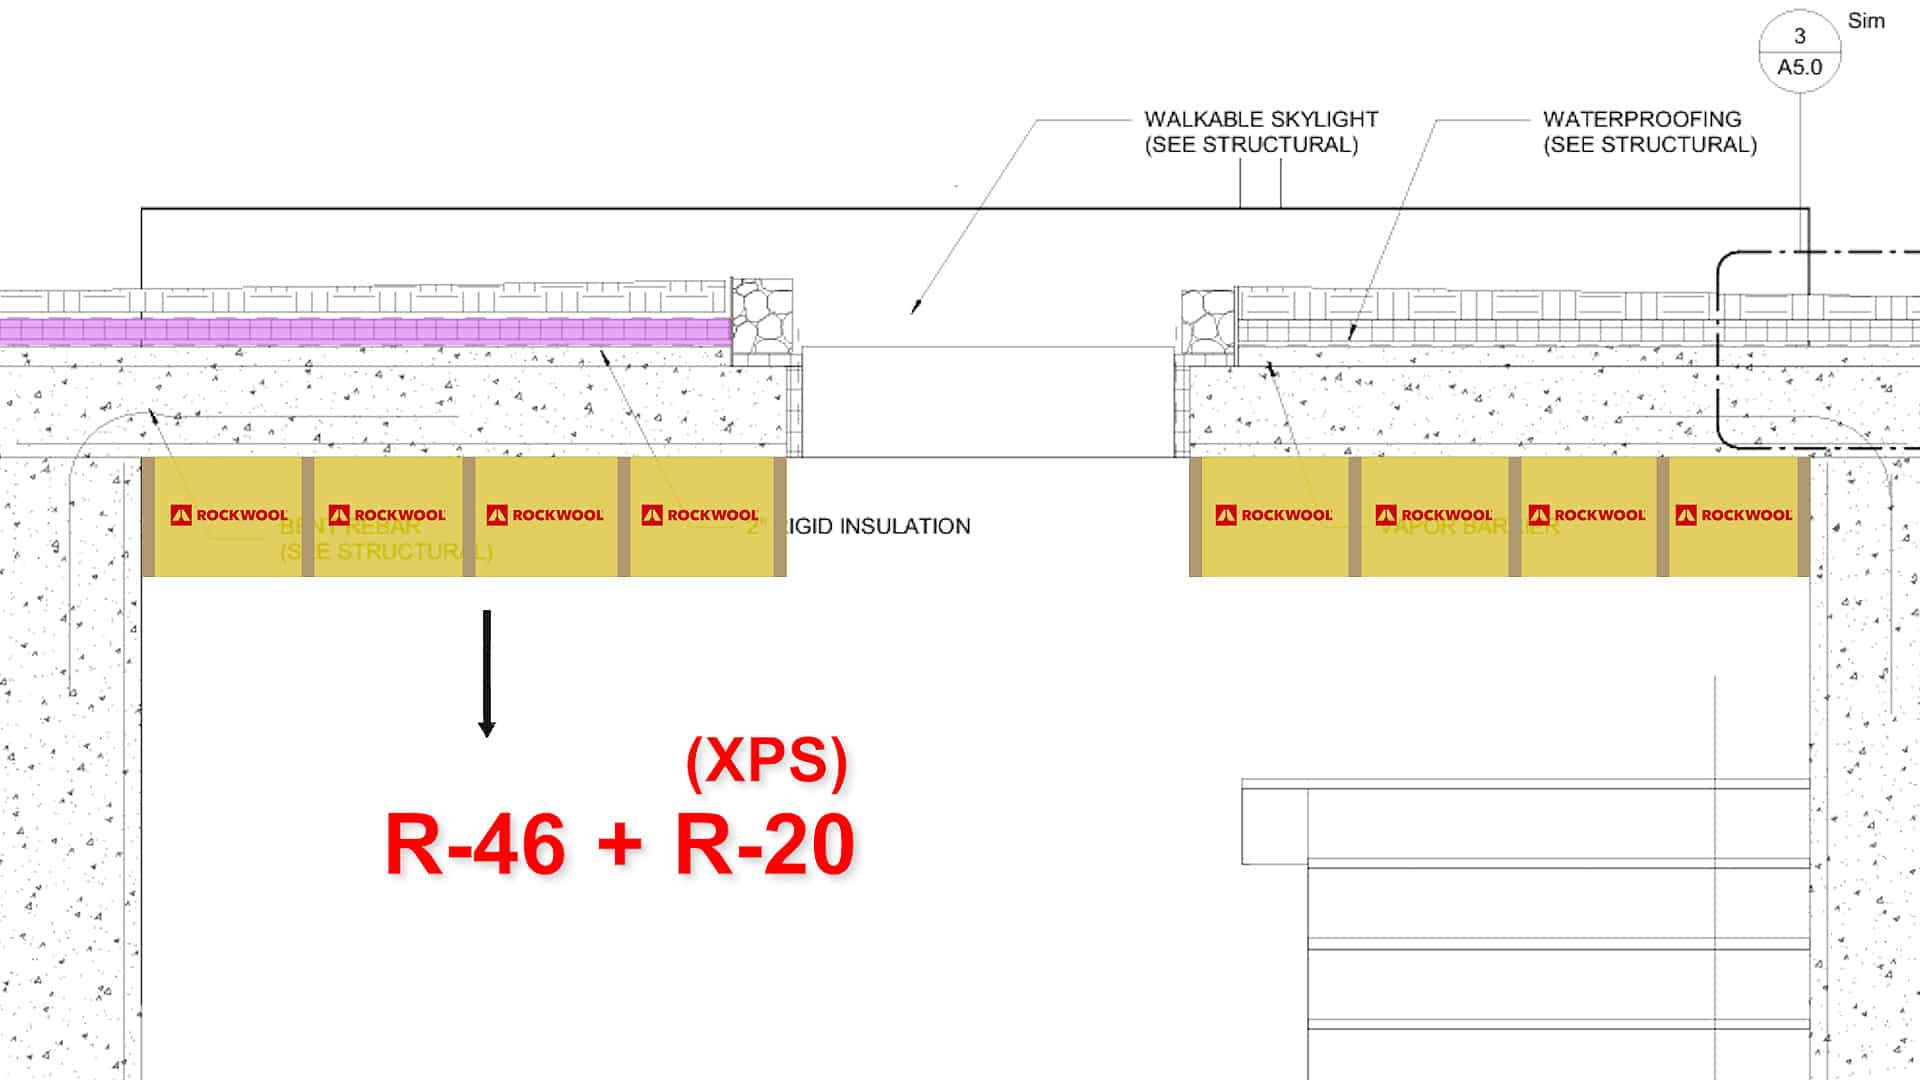
The floor assembly includes an eight inch concrete slab with four inches of XPS (extruded polystyrene) continuous insulation above it. The insulation layers are staggered to reduce thermal bridging and provide approximately R20 of continuous insulation. An additional twelve inches of Rockwool in the framed area adds another layer of protection to the assembly. For a below grade project, this coordination matters. Concrete is difficult and expensive to modify after the fact. The more plumbing, electrical, ductwork, and insulation that can be planned within the available framing, the fewer compromises are required once the surfaces are closed.
Below Grade Laundry Room Design
A small closet in the middle of the tunnel has to accommodate more than a washer and dryer. It also contains drainage, sound control, and the main return for the heating and cooling system. The location made a conventional dryer impractical. The closet is far from an exterior wall, so a standard dryer exhaust would require a long duct route with difficult coordination and additional resistance to airflow. We selected a heat pump, condensing, ventless washer and dryer combination instead.
A ventless heat pump dryer does not require a traditional exhaust duct to the exterior. That makes it particularly useful in a room located deep inside a below grade structure. The tradeoff is that the filters need regular cleaning. We have used the same type of unit in the main house for three years, and it has performed well in daily use. The laundry also sits below the available gravity drainage point. The space is approximately twelve feet below grade and about seven feet lower than the main drain outlet through the foundation toward the septic system.
Because gravity cannot carry the wastewater from every fixture to that outlet, the plumbing is prepared for a Saniflo macerating pump. The pump allows wastewater to be collected and lifted to the correct drain elevation. The important construction requirement is access. Pumps and service components should never be enclosed in a way that makes future maintenance require demolition.
Laundry and Bathroom Sound Control
The laundry closet shares a heated envelope with the bathroom, but the rooms still need acoustic separation. Warmth does not prevent sound from moving through a wall. We are using mineral wool in the partitions to reduce noise from the washer and dryer and to limit plumbing sounds from the bathroom. This is a sound control decision rather than a thermal separation decision.
The additional material did not require a major cost increase. We were able to use cutoffs from other areas where the same insulation was already being installed. That is a small example of the value of coordinating the work across the entire project. Material that might otherwise be discarded can improve the performance of a nearby partition.
Accessible HVAC Return Design
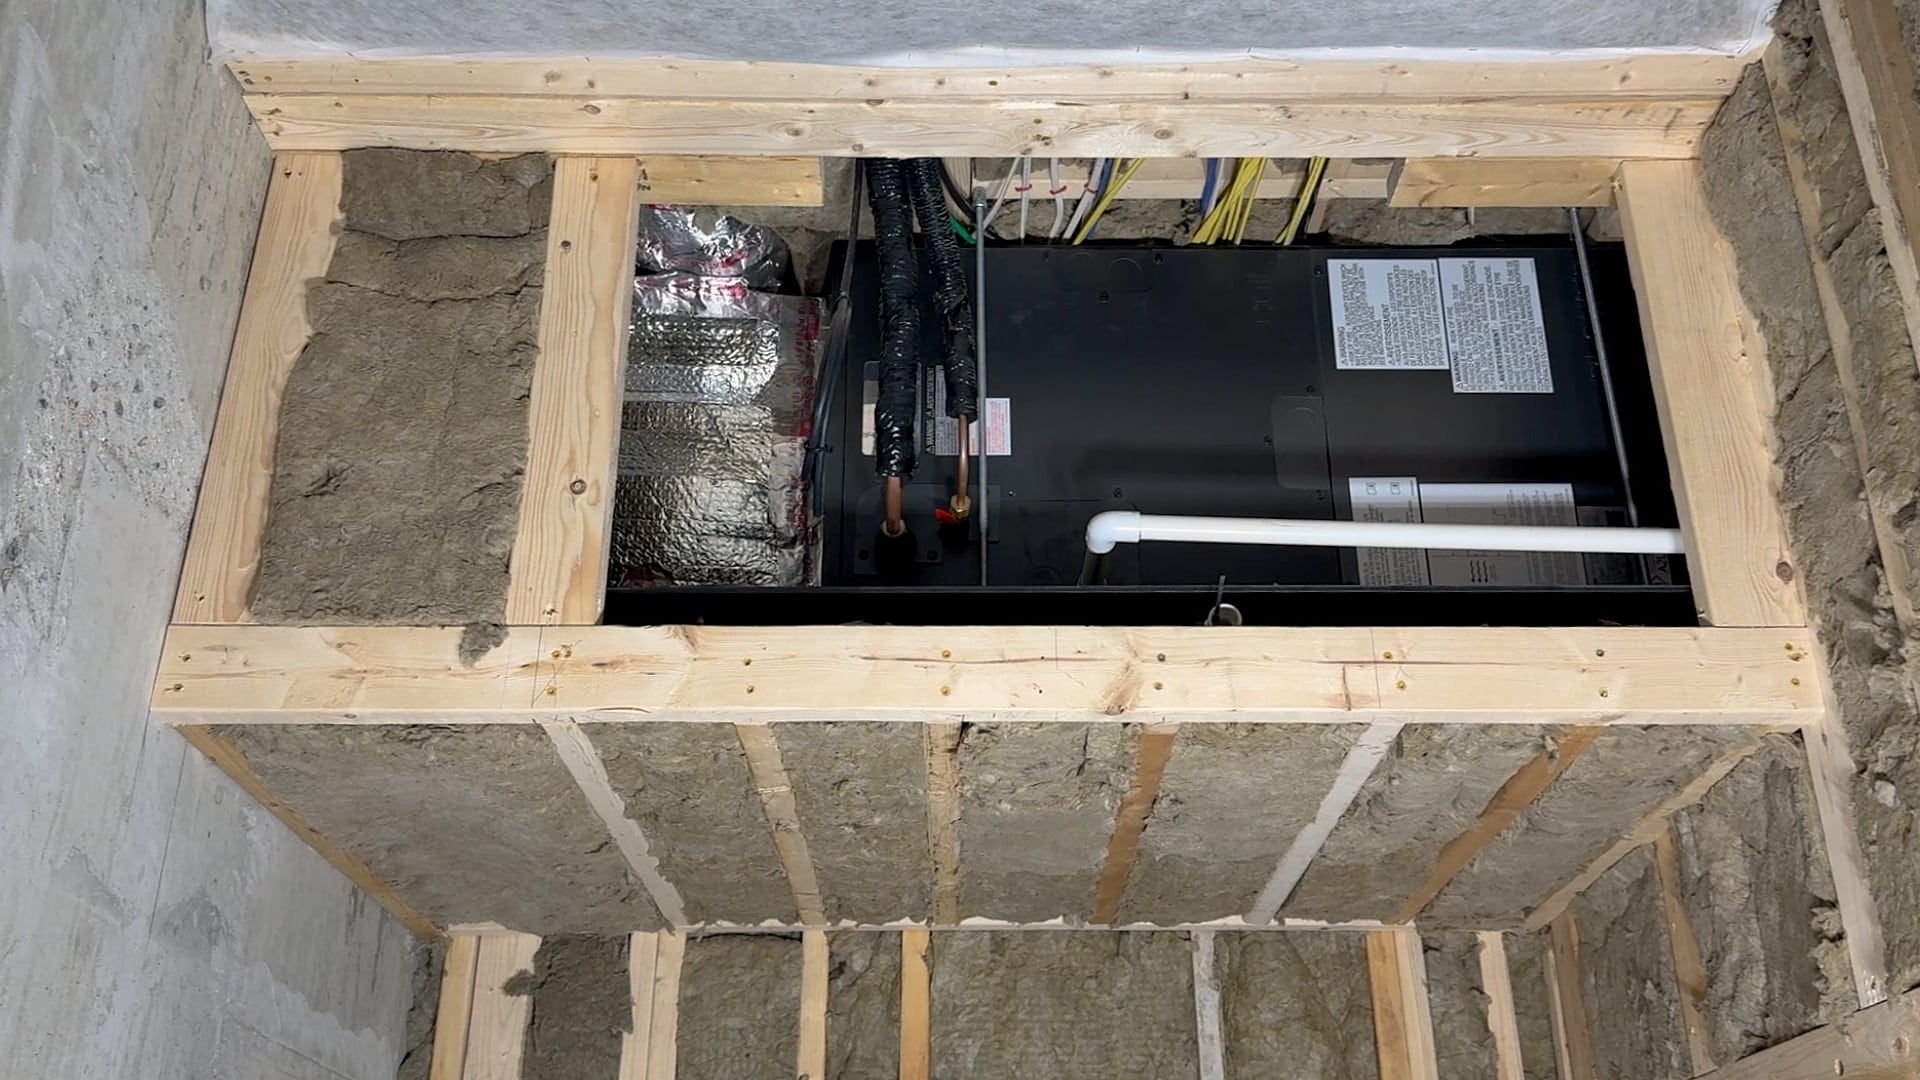
There is a Mitsubishi air handler located above the laundry and bathroom area. We placed the main return grille in the laundry closet, directly over the washer and dryer. The air handler can be installed vertically, rotated ninety degrees, or placed horizontally. In this installation, the return connection is on the side. The ceiling of the closet provided the most practical route for the duct.
Locating the grille inside the closet keeps a large mechanical feature out of the main room while maintaining access for filter changes. Rather than relying on the filter at the suspended unit, we plan to install the filter at the return grille, where it will be easier to reach. The grille and closet door are positioned to allow the filter to be removed and replaced without difficulty. Service access is an important part of the design. Planning for routine maintenance from the beginning helps ensure the system remains practical for the homeowner over time.
Bathroom Ventilation Below Concrete
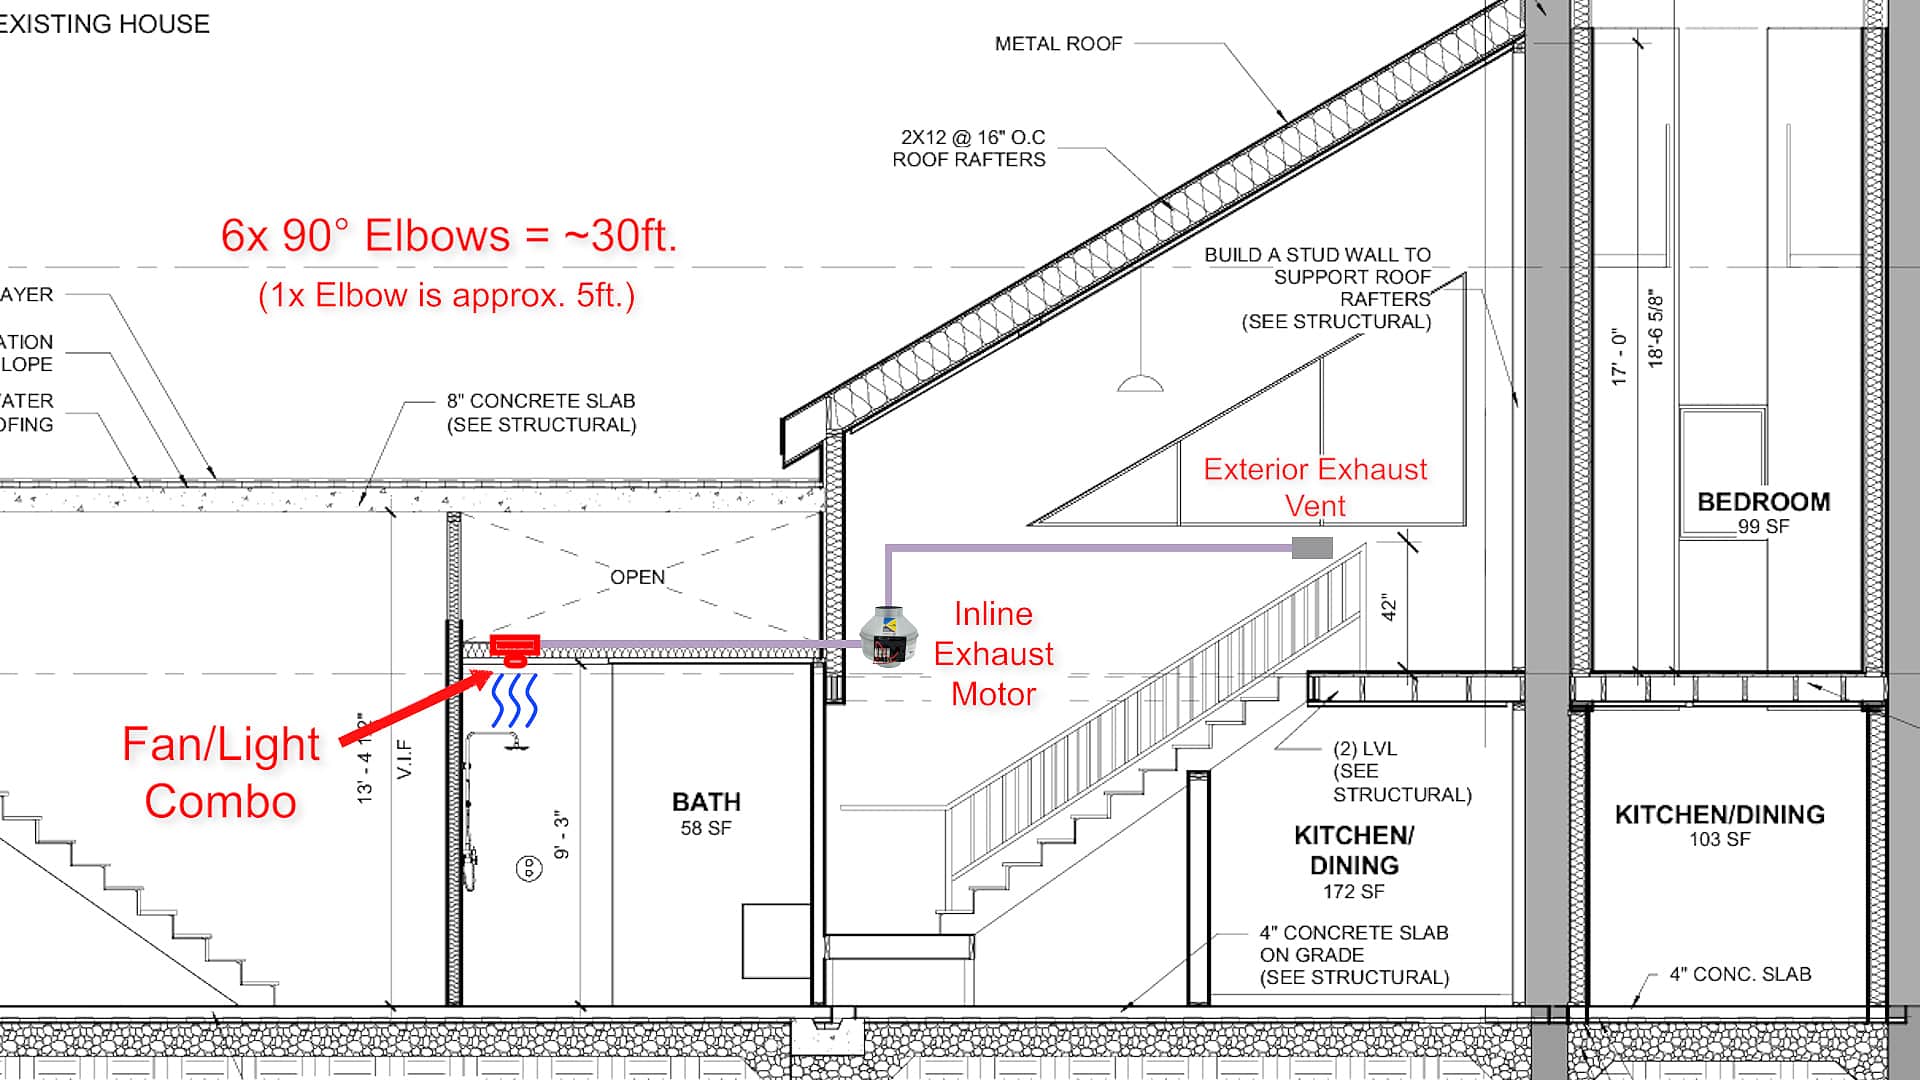
The bathroom includes a wall mounted Toto toilet (personally one of my favorite brands), a Saniflo macerating pump, and a forty eight inch double sink vanity. The limited footprint requires careful fixture placement, but the pump still needs an access panel for service. The most difficult issue was bathroom ventilation. The room is below an eight inch concrete slab, so there is no direct route for a short exhaust duct to the outside. That does not change the basic requirement. The bathroom still needs to remove moisture, odors, and warm humid air.
We selected an inline bathroom fan. The visible ceiling fixture will combine a recessed light with an air intake above the shower. The fan motor itself will be located farther along the duct route, outside the bathroom. The duct path includes a number of turns which is approximately six ninety degree elbows. Bends create resistance, so they must be treated as part of the total effective duct length rather than ignored. In this case, the elbows represent approximately thirty feet of equivalent straight duct length.
The inline motor, the Fantech FG4 Inline Exhaust Fan allows the fan to pull air through most of the long route and push it through the final section to the exterior exhaust cap. This arrangement gives the system a better chance of maintaining the required airflow despite the difficult geometry.
The exact fan capacity, duct size, fitting count, and allowable run must be coordinated with the selected equipment and applicable requirements. The broader lesson is straightforward: below grade ventilation has to be designed before the ceiling and slab access disappear. It is expensive to change a duct route after drywall and plaster are installed.
Insulating a Grain Silo Bedroom
Moving to the upper level of the silo, this room will become a bedroom. The original structure is twelve feet in diameter, so preserving interior space was one of the main framing objectives. A conventional 2×4 wall would have consumed approximately seven inches of diameter before the drywall was installed. Instead, we used LVL studs laid flat against the silo blocks. With the insulation and drywall assembly, the total loss is approximately four inches. The resulting interior diameter will be close to eleven feet eight inches.
The LVLs are attached to the masonry with screws, but they do not sit directly against the structural terracotta tiles. We cut Cor-A-Vent corrugated plastic into small sections and placed it behind the studs. This creates a gap of approximately three eighths to one half inch. That small gap serves two important purposes. It creates a protected route for wiring behind the studs, which avoids drilling, notching, or cutting the LVLs. It also provides room for two inches of Rockwool Comfortboard 80, adding approximately R8 to the insulation package.
The framing solution is therefore doing several jobs at once. It preserves floor area, creates a wiring route, adds insulation, and limits direct contact with the historic silo wall. In a round building, those decisions cannot be made independently because every inch affects the finished room.

Framing a Round Interior
Framing a circular building takes more time than framing a conventional rectangular room. The challenge is not only attaching studs to the curved wall. It is also creating a level floor, a usable upper wall, and openings that can accept standard building components. The floor framing required a series of short plates cut to the correct angles and joined together. Plywood was placed between the plates to gain height because the available LVLs were sixteen feet long, while the room extends more than sixteen feet from the lower level to the peak. The total height is close to approximately twenty feet at the peak.
Any straight element installed in the silo requires additional preparation. A window, for example, must sit square even though the surrounding wall is curved. The opening needs to be formed, supported, insulated, and finished carefully so the window does not follow the curve or introduce gaps in the envelope.
That additional labor is an unavoidable part of circular construction. It is not a reason to force a round structure into a rectangular design. The extra work allows the finished bedroom to retain the proportions and character of the original silo while still receiving standard doors, windows, finishes, and building systems.

Fresh Air for the Silo Bedroom
The bedroom also needs controlled fresh air. A well insulated room benefits from mechanical ventilation because air exchange should not depend entirely on opening a window or leaving a door ajar. We are using a Panasonic single point energy recovery ventilator, or ERV. The system supplies fresh air and exhausts stale air through a Y-shaped duct arrangement that connects to a single exterior termination.
Installing the ERV required a flat ceiling so the ductwork could cross the space. The bedroom ceiling being nearly twenty feet high, made the placement of the air outlet important. We located it as close as possible to the bedroom door rather than placing it high in the center of the room. That location connects the bedroom to the air movement at the doorway. When the door is opened in the morning, fresh air can enter the room more effectively, regardless of the season. It also keeps the system closer to an accessible part of the room instead of placing it in a difficult location near the peak.

Mechanical Systems Before Drywall
The final insulation and rough work have to be completed before the drywall and plaster crews arrive. After that point, most of the systems described here will no longer be visible. Cement board and parged mortar will preserve the raw character of the tunnel, while mineral wool helps manage heat loss and sound. A macerating pump accommodates the below-grade plumbing, and carefully positioned HVAC and exhaust components keep the mechanical systems accessible and functional. Inside the silo, custom framing preserves interior space while making room for wiring and insulation, and an energy recovery ventilator supplies fresh air to the future bedroom.
None of these decisions is dramatic on its own. Together, they determine whether an unusual building is merely finished or actually works well for the people living in it.
At Pionarch Design and Construction, we approach difficult spaces by resolving the structure, envelope, mechanical systems, maintenance requirements, and finish materials as one coordinated project. If you are planning a renovation or new build with below grade rooms, unusual geometry, or complicated service routes, contact us to discuss how to solve those conditions before they become expensive problems.
Photo Credits
All images used in this blog are courtesy of Pionarch.